Wednesday, December 30, 2009

Nigella's Mini Pavlovas


Strangely enough I've never made a pavlova before, I've always been a little bit scared to make them. Every Christmas l always hear my mum and aunties complain how their pavlovas didn't rise enough or were too sweet. I think one of their problems was that they all use the same recipe and are probably unwilling try something new.

I came across this recipe in Nigella Lawson's "How To Be a Domestic Goddess". They were really easy to make and everyone raved about them!

Enjoy!

Y x
Mini Pavlovas
(Makes 18. Recipe Nigella Lawson)

8 egg whites
a pinch of salt
500g caster sugar
4 tsp corn flour
2 tsp white wine vinegar (makes the meringues chewy inside)
1 tsp vanilla extract (I didn’t have any so I just substituted 100 gram of the above 500 gram caster sugar with my own vanilla sugar, which basically is a jar of caster sugar to which I add scraped used vanilla pods instead of throwing them in the trash).

Preheat the oven to 180°C. Line 3 baking trays with baking paper.

Beat the egg whites and salt until the miixture form satiny peaks. Keep beating the egg whites while adding sugar little at a time until the meringue is stiff and shiny. Sprinkle over the corn flour, vinegar (and vanilla extract, if using). Fold in gently.

Form round meringues on the trays lined with baking paper, around 10 cm a cross and 1.5 cm high. Make an indentation in the middle of every pavlova with the back of a spoon. Put in the trays in the oven and immediately reduce the heat to 150°C. Bake for 30 minutes. Turn off the oven and leave the Pavlovas inside for 1.5-2 hours.

Serve the Pavlovas with whipped cream, fresh fruit and a nice fruit syrup.

Tuesday, December 29, 2009

Gingerbread Cupcakes with Ginger Caramel Icing


I hope everyone had a fabulous Christmas! Sorry l've been a bit slack with my posts but l've been busily baking for one whole month. Our family Christmas's are not the norm and tend to be a really large affair, this year we had 60 people for a sit down dinner. Luckily l don't have to prepare all the food myself, but l volunteered to make a dessert buffet. So over the next couple of weeks l will share all the wonderful recipes.

You all know of my love for Gingerbread Cookies! I can now add to that, with Gingerbread Cupcakes. These are just divine, the crystallized ginger gives it an extra zing that you would never expect.

Makes 24

300g Plain Flour
1/4 tsp baking soda
1/2 tsp salt
2 tblsp ground ginger
1/2 tsp mixed spice
150g unsalted butter, softened
400g Caster Sugar
4 eggs
1 1/2 tsp vanilla essence
100g finally chopped crystalized ginger
160ml sour cream
Pre-Heat Oven to 170'C, line two 12 hole muffin trays with cupcake papers.
Sift together flour, baking soda, salt, ground ginger and mixed spice.
In a separate bowl, cream the butter for 1-2 minutes. Add the caster sugar one third at a time, beating for 2 minutes after each additions. Beat until the mixture is light and fluffy and the sugar has almost dissolved.
Add eggs one at a time, beating well after each addition until the mixture is light and fluffy. Add the vanilla essence, half the sifted dry ingredients and the chopped ginger and half of the sour cream and stir until just combined. Repeat with remaining ingredients.
Divide mixture amongst the cupcake papers ad bake for 20 minutes or until the cakes spring back when gently pressed.

Ginger Caramel Icing

125g Butter
200g brown sugar
80ml cream
1 tblsp ground ginger
500g icing sugar

Melt butter in a small saucepan. Add the brown sugar and stir over low heat until the sugar dissolves. Bring the mix to a boil, reduce heat and cook for 2-3 minutes. Stir in the cream and ginger.

Cool to a lukewarm temperature. Gradually stir in the icing sugar and cool the mixture completely. Beat until the frosting is light and creamy. If the frosting is too stiff, add a little more cream.

Enjoy!

Y x

Saturday, December 19, 2009

Christmas Treats for the Neighborhood Kids


There is nothing nicer then living in a street where there are quite a few Children and that they can actually play with one another.

This year Cooper who is always very generous wanted to give his friends a little gift. Unfortunately time wasn't on my side, so instead of baking something l found these gorgeous little red boxes and filled them with red and white lollies. I think it looks really affective and festive to boot!

Enjoy!

Y x

Friday, December 18, 2009

After Dinner Mints


What better way to finish off a large Christmas meal then with a nice cup of coffee and some after dinner mints, not only do they look fantastic they taste delicious too!

After Dinner Mints

Makes 24

You will need small chocolate foil cups.

200ml Pure Cream
400gms Dark Chocolate
2 tbsp Creme de menthe (or peppermint essence)
2 Peppermint Crisps Crushed

Place Chocolate and cream in a heat proof bowl over a saucepan half-filled with simmering water making sure the bowl doesn't touch the water. Stir with a metal spoon until the chocolate melts and the mixture is smooth. Stir in the creme de menthe.

Place a zip lock bag in a large glass and push the bag down the bottom and place the top of the bag over the glass. Fill the bag with the chocolate and cut a small hole in one of the bottom corners so it acts like a piping bag.

Fill the foil cups 3/4 of the way and the scatter the peppermint crisp over the top.

They can be stored in the refrigerator in an airtight container for 2 weeks.

Enjoy!

Y x

Wednesday, December 16, 2009

Truffles, Truffles and more Truffles

I've never made truffles before, and have never really eaten them either which is probably a good thing otherwise l would be the size of two houses put together!
I couldn't believe how easy they were too make and the combinations you can make are endless the next on my list are Choc Mint, Honeycomb and Cherry Ripe YUM!

White Chocolate Coconut Truffles

Makes 32

2 x 220g pkt white choc coarsely chopped
80 ml (1/3Cup) Thickened Cream
1/4 Coconut
2tblsp Malibu (I used coconut essence)
200g white choc melts
Shredded Coconut, to decorate

Place Chocolate and cream in a heat proof bowl over a saucepan half-filled with simmering water making sure the bowl doesn't touch the water. Stir with a metal spoon until the chocolate melts ad the mixture is smooth. Stir in the coconut and the Malibu.
Place in Fridge for 4 hours to Chill

Roll truffles into balls, melt Chocolate Melts and spoon a tablespoon of chocolate over the truffle in a circular motion. Decorate with the Shredded Coconut and place in fridge until firm.

Rocky Road Truffles

2 x 220g milk chocolate coarsely chopped
1/3 cup cream
2tbs Tia Maria
1 cup Mini Marshmallows
80g red glace cherries chopped
200g chopped peanuts

Place Chocolate and cream in a heat proof bowl over a saucepan half-filled with simmering water making sure the bowl doesn't touch the water. Stir with a metal spoon until the chocolate melts ad the mixture is smooth. Stir in the Tia Maria and let it cool for 2o minutes. Stir in the mini marshmallows and place in the fridge for 4 hours to chill.

Roll Truffles into balls and the roll in chopped peanuts and then place in fridge until firm.

Bailey's Truffles

2 x 220g pkt dark choc coarsely chopped
80 ml (1/3Cup) Thickened Cream
2 tblsp Bailey's
100g Chocolate Sprinkles

Place Chocolate and cream in a heat proof bowl over a saucepan half-filled with simmering water making sure the bowl doesn't touch the water. Stir with a metal spoon until the chocolate melts ad the mixture is smooth. Stir in the Bailey's and place in Fridge for 4 hours to Chill

Roll Truffles into balls and the roll in Sprinkle and then place in fridge until firm.

Enjoy!

Y x


Saturday, December 12, 2009

Christmas Cake

Just a sneak peak of my Christmas Cake Creations.....


Enjoy!

Yx

Friday, December 11, 2009

School is out...

Just thought l would quickly share some things l made for Coopers School Break Up!

Enjoy!

Yx


These were made for all the kids graduating from Kinder, it's hard t believe my son will be one of them!


These gift bags were for the fabulous teachers!


These were made for all his classmates!


Tuesday, December 8, 2009

Candy Cane Chocolate Brownies

Sorry it has been a long time between posts but l have been incredibly busy! Not that that should be an excuse.

Every Christmas we get overloaded with Candy Canes, and there are only so many you can eat. So when l saw this idea l couldn't wait to give it a try.


I made these to give them as gifts for Coopers teachers. I used my favorite Nigella Lawson Brownie Recipe.

While the brownies are cooking smash about 12 candy canes, I used the bottom of a glass.

To make the ganache you will need 200g of pure cream and 400g of chopped dark chocolate. Gently boil the cream, once boiled pour over the chocolate and whisk together until smooth.

While the brownies are still warm pour the ganache over and then sprinkle the crushed candy canes.

Leave to set for a couple of hours before cutting.

Some other news is that my website is up and running so please have a look and let me know what you think

www.bakingaddict.com.au


Enjoy!

Y x


Sunday, November 22, 2009

Cakes and more Cakes

Here are just a few things that have kept me busy during the week


Enjoy!

Y x


Monday, November 16, 2009

The perfect flat cake


Baking a flat cake is not as simple as it sounds, over the years l have tried various tricks. Rotating the cake, using a flower nail, lowering the oven temperature and the list goes of tricks goes on. After scouring the internet l came across some DIY baking strips, and as you can see in the picture above they worked! Who would of thought something so simple could work so effectively. I'm not sure if this was a fluke or not but they also made the cakes rise to 4 inches in height.

Cut a piece of tin foil and Paper towel long enough to fit around your tin.

Fold the Paper Towel in half. Wet a clean sponge and squeeze the water onto the paper towel.

Fold Tin Foil over so it covers the Paper Towel and do the same to the other side

Wrap the tin foil around the tin and secure with string.

Enjoy!

Y x

Friday, November 13, 2009

White Chocolate Blueberry Scones


I have always been intrigued with the idea of Lemonade Scones, I always make the traditional kind. But l had some cream in the fridge that needed to be used.

I love the simplicity of this recipe, the scones were prepared and baked in under 30 minutes. They are deliciously moist and even my son's ate them and they don't like berries, I highly recommend them and I think they would make the perfect morning or afternoon treat.

Recipe

3 Cups of Self Raising Flour
250ml Lemonade
250ml Cream
I added a big handful of White Chocolate Chips and a small container of Blueberries.

Although l did find that l needed to add more flour as the mixture was very wet.

Heat oven to 220'
Just add all ingredients at the same time and mix until combined.
Divide mixture evenly, mine were the size of my palm.
On a baking tray place them next to one another, apparently this helps them rise.

Cook them for 15 minutes until lightly browned.

Enjoy!

Y x

Monday, November 9, 2009

Christmas Cookies

Christmas Ball Cookies

With Christmas just around the corner and my husband away l thought l would practice some ideas for Christmas Gifts, in previous years l have always just bought Coopers teachers a gift but this year l thought l would make something more personal.

Once again l used a combination of Gingerbread and Vanilla Bean Cookies, I then found the cookie template online, you could even draw it freehand or buy the cutters. I drew the template onto heavy cardboard. After rolling the dough, place the template on top and cut around. This bit is a bit tedious, if you are planning on making a big batch l would definitely invest in a cookie cutter.

I place the fondant on while cookie is still warm, as the warmth helps the fondant stick. I then took my smallest flower cutter which was about 1.5cm and pressed it randomly around the cookie.

For the gold l used this edible old paint .

Enjoy and stay tuned for some more designs!

Y x


Thursday, November 5, 2009

A partridge in a pear tree


Well here is the finished product for my Christmas Cake, I decided to use a modern take on A Partridge in a Pear Tree.
I got the idea from this christmas card, but l wanted to try something new and use a ivory and grey colour theme. I really loved how this cake turned out, l don't usually do modern designs but l really love this. I'm all ready planing how my Christmas dessert buffet will work with this cake!

Enjoy!

Y x

Tuesday, November 3, 2009

The race that stops the nation


Well today was Melbourne Cup and for all of you that don't know, Melbourne Cup is known as the horse race that stops the nation. It's run on the first Tuesday of November and for everyone that lives in Melbourne it means a 4 day long weekend ( if you work for a generous company)

Crowds flock to the races and the Flemington grandstand are usually packed to maximum capacity. This year they had over 100,000 people. The atmosphere is similar to that of a large party with champagne flowing, racetrack fashions and ladies with huge hats. I highly recommend going if you can!

But for me l celebrated it with a BBQ at our house with some dear friends, it was a bit of a last minute affair so l quickly whipped up my classic vanilla cupcakes with buttercream icing. I decorated the cupcakes with some lucky (unfortunately unlucky for some) horseshoes which were made out of fondant.

Here is a snapshot from our BBQ, they all had jockey hats on (back to front apparently it's cooler). Cooper was the lucky one and won our sweep, he was so excited with his $40.00 win as was I. His parents on the other hand won nothing, oh well better luck next year.

Enjoy!

Y x

Sunday, November 1, 2009

A way to a man's heart...


Unfortunelty l married a man who is not fussed with food, don't get me wrong he loves a good meal but would be quite happy with fish fingers and frozen peas. He sounds quite ideal doesn't he? but there is no way l could win him over with a nice meal or a delicious dessert.

But my brothers on the other hand are easily lead by food! My brothers are spending the weekend installing my mum's new kitchen, and after they have worked all weekend this is probably not something they want to be doing.

So trying to brighten their moods l made them some Banana and Chocolate Muffins for their morning tea. After reading all of these great reviews on Epicurious l just had to give them a try, everyone was right they were delicious but they stuck the wrappers which is a big pet peeve of mine. But l was the only to notice this and the tradies didn't mind at all :-)

  • 1 1/2 cups all purpose flour
  • 2/3 cup sugar
  • 1 1/2 teaspoons baking powder
  • 1/4 teaspoon salt
  • 1 cup mashed ripe bananas (about 2 large)
  • 1 large egg
  • 1/2 cup unsalted butter, melted
  • 1/4 cup milk
  • 3/4 cup semisweet chocolate chips

Preheat oven to 350°F. Line twelve 1/3-cup muffin cups with foil muffin liners. Mix flour, sugar, baking powder and salt in large bowl. Mix mashed bananas, egg, melted butter and milk in medium bowl. Stir banana mixture into dry ingredients just until blended (do not overmix). Stir in chocolate chips.

Divide batter among prepared muffin cups, filling each about 3/4 full. Bake muffins until tops are pale golden and tester inserted into center comes out with some melted chocolate attached but no crumbs, about 32 minutes. Transfer muffins to rack; cool.

Wednesday, October 28, 2009

It's beginning to look a lot like christmas

Well as scary as it sounds Christmas is just around the corner, so what better way to get the Christmas preparations under way then baking your Christmas cake. I have had my fruit soaking for quite some time just waiting to find the perfect recipe. I was lucky to stumble upon one on FlickR, the photo was so inviting I just had to give it a try.

With my trusty sidekick by my side we set off to make the beginnings of Christmas! The cake cooked beautifully, leaving the house smelling like Christmas. You will have to wait a while to hear what it tastes like, but l promise l will get back to you!

Enjoy!

Y x

Tuesday, October 27, 2009

Throw it all in quiche!

Normally Quiches in our house are saved for occasions when there is very little food in the fridge, but last night l thought I might actually put a little bit of effort into it. I normally make Donna Haye's Short Crust Pastry but the last two times l have made it has failed miserably.

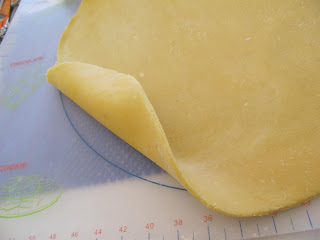
I'm so glad l decided to try another recipe, because this one was so beautiful. I couldn't believe how easily the pastry rolled, there were no tares or cracks which is a very rare thing for me! Oh and of course tasted fantastic.

The recipe for the pastry is

Pre-Heat oven to 180' Degrees

2 cups of flour
125g butter chilled
2 egg yolks
Iced water if needed

Chop butter into small cubes and place in flour, combine until it looks like breadcrumbs. Mix together until a dough is formed, add small amounts of water if required. Wrap in plastic and put it in the fridge for 15 minutes.

Roll out and then place in a tin I used an 8 inch tin, cover with baking paper and put rice or baking weights over the paper. Cook for 15 mins , then remove the paper and weights and cook for another 15 minutes or until lightly browned.

Now for the filling l am just a throw it all in kind of girl. So l added bacon, mushrooms, spring onion, roasted capsicum, feta cheese, 4 eggs, and about 200 ml of cream.

Mix all your filling ingredients and cook until lightly brown and the mixture is set.

Enjoy!

Y x


Sunday, October 25, 2009

Planet Cake Part Two


Wow what an amazing three days! I can't believe how exhausted l am. This is my masterpiece, a two tier chocolate mud cake layered and covered in ganache and iced with fondant. We decorated the cake with a Magnolia Flower and Bamboo Skewers which were all made by yours truly.

Here is a picture of all the other cakes that were made, I think everyone did a fab job!


With the over abundance of cake l decided to donate my cake to a local charity that serve meals to people in difficult situations.

Enjoy!

Y x

Friday, October 23, 2009

Planet Cake Part One


Today was my first Planet Cake workshop, to say l was excited would be an understatement. I felt like a little kid that couldn't sleep because it was going to be Christmas the next day. I even had a night mare and woke up in the middle of the night thinking that l hadn't baked a cake to bring to class.

We had ten people in our Class with Jessica (she is holding the cake in the below picture) as our teacher and Fran (bottom centre) our facilitator, Jessica is amazing and at the ripe old age of 2o something is a fully qualified chef, pastry chef, chocolatier and guru cake decorator. And Fran is equally talented and incredibly funny! You can see some of her woke here http://www.flickr.com/photos/franjmc/3921809359/ .


The class was very full on, I think l learnt more in the past six hours, then l did doing the previous 8 week cake course. We were taught so many "cool tricks", but it will be a long time before l perfect Planet Cakes sharp edges.

Tomorrow we will do a two tier square cake, stay tuned for part 2.

Enjoy!

Yx